deploying and using oauth2_proxy to Google Kubernetes Engine
Ever have a cool web application (Prometheus, Kubernetes Dashboard) and wanted/needed some sort of authentication mechanism for it? Enter oauth2_proxy. This post covers using a oauth2_proxy with Kubernetes and integrating it with an NGINX ingress controller and kube-cert-manager, allowing a user to slap on authentication to any web application.
overview
NOTE. I am no oauth expert, but I play one on TV. I may have some details mixed up…
NOTE 2 - oauth image credit to Chris Messina
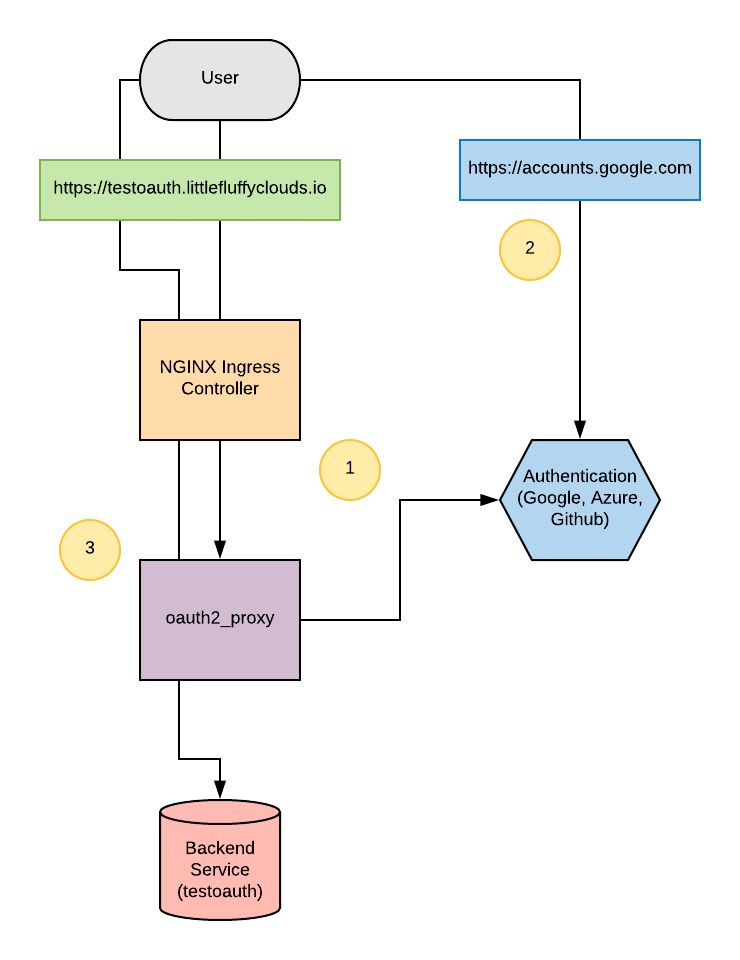
oauth2_proxy is a very cool reverse proxy that uses a provider (like Google, Azure, or Github) to enable three legged oauth to an unauthenticated web service (like Prometheus). The general flow of the three legged oauth with oauth2_proxy is as follows:
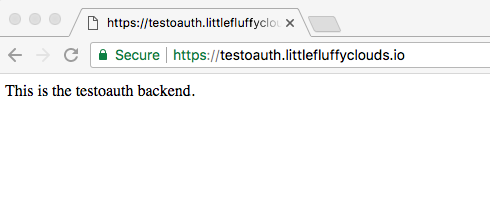
- User attempts to access the backend service, in this case https://testoauth.littlefluffyclouds.io. The user has no token and the user is redirected to…
- https://accounts.google.com (or your favorite Provider). It is important to note the user logs into GOOGLE, in this case. Once authenticated, they receive a token. Credentials are NOT PASSED TO THE https://testoauth.littlefluffyclouds.io web application.
- After user is authenticated and they have the oauth token, they can access the backend service through the oauth2_proxy reverse proxy.
The general flow kind of looks like this:
Now to walk through the deploy.
requirements
- A Google Cloud Platform account.
- The Google Cloud SDK
- The Kubernetes CLI client (kubectl).
- A working NGINX ingress controller, as documented here.
The configuration of Google Cloud and the service account are somewhat out of scope here, but a few notes and references can be found here.
To use the oauth2_proxy setup, the NGINX ingress controller needs to be deployed, again, as covered here. With that in place, this post covers deploying oauth2_proxy to Kubernetes:
- oauth2_proxy
- A test site, which demonstrates the oauth2_proxy configuration.
The test site demonstrates the oauth2_proxy functionality, which redirects to Google for authentication, and then reverse proxies all authenticated traffic to the back end. It is important to note that this walkthrough covers authenticating against a domain, in this example, littlefluffyclouds.io. This domain has been setup with G Suite and with a valid email address. For personal gmail accounts, the same can be done, just with an “authenticated emails file”. See the oauth2_proxy documentation for more information.
catching up - deploying and using the NGINX Ingress Controller and kube-cert-manager
The oauth2_proxy acts the authentication mechanism and it requires other components, most notably the NGINX ingress controller and TLS. I previously covered deploying these services here:
These are required for this particular configuration. With these services properly established, we’ll skip right to the oauth2_proxy stuff…
Google API credentials configuration
First, oauth2_proxy communciates (in this example) with Google. It requires that the oauth client ID and client secret be configured, along with the proper redirect URLS. oauth2_proxy has excellent documentation on this for using the Google Provider. Note the “Authorized redirect URIs”. This will be https://testoauth.littlefluffyclouds.io/oauth2/callback, where you will replace the hostname/domain with your site. The important thing to note is the oauth2/callback. This sends the user to your site, after Google authentication has completed. Here’s an example of what the oauth configuration looks like:
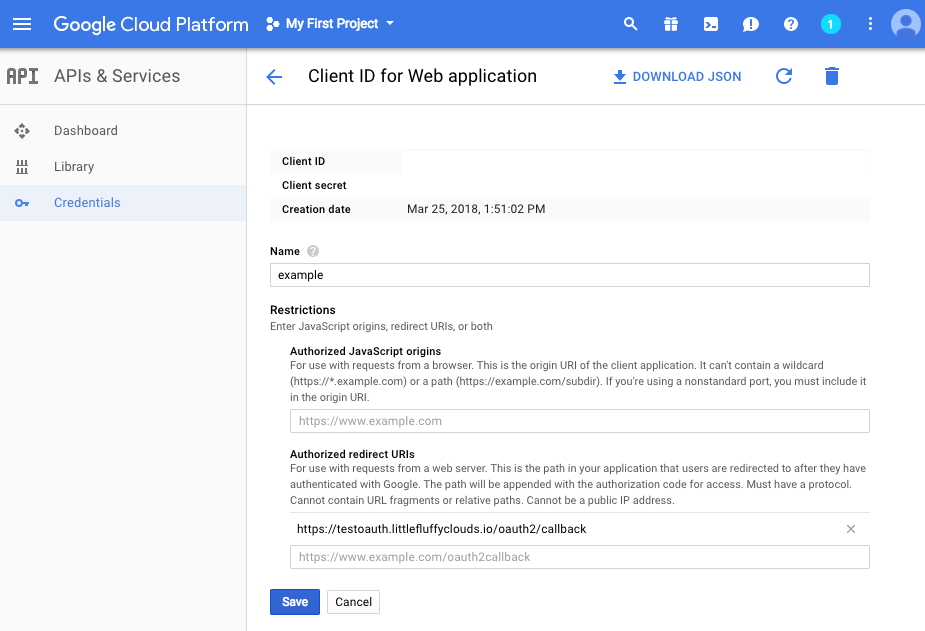
Be sure to save the Client ID and Client Secret somewhere. We will create a Kubernetes secret from these.
creating the Kubernetes secret
Now that we have the oauth client/secret for integration with Google, we need one more secret value; the cookie secret. To generate that:
python -c 'import os,base64; print base64.urlsafe_b64encode(os.urandom(16))'
Save that with the client ID and client secret. With these secrets, we can create the Kubernetes secret:
kubectl --namespace default create secret generic oauth \
    --from-literal=OAUTH2_PROXY_CLIENT_ID=your_client_id_from_google \
    --from-literal=OAUTH2_PROXY_CLIENT_SECRET=your_client_secret_from_google \
    --from-literal=OAUTH2_PROXY_COOKIE_SECRET=the_random_base64_encoded_value_from_above
You can view the secret by:
kubectl --namespace kube-system get secrets oauth -o yaml
oauth2_proxy deployment
Google API credentials? Check. Client ID, client secret, and oauth2_proxy cookie configured? Check. Now we finalize the oauth2_proxy deployment.
Deployment is pretty straightforward. They code and yaml can be found in the Github repo. It requires one modification, the email-domain. Note the arguments that it is run with:
        - --email-domain=<YOUREMAILDOMANHERE>
        - --upstream=file:///dev/null
        - --http-address=0.0.0.0:4180
Update the email domain as needed. There are other oauth2_proxy arguments that can be used, and a list of them can be found here.
Also note how the oauth secrets are passed in as environment variables from the Kubernetes secret created earlier:
        - name: OAUTH2_PROXY_CLIENT_ID
          valueFrom:
            secretKeyRef:
              name: oauth
              key: OAUTH2_PROXY_CLIENT_ID
        - name: OAUTH2_PROXY_CLIENT_SECRET
          valueFrom:
            secretKeyRef:
              name: oauth
              key: OAUTH2_PROXY_CLIENT_SECRET
        - name: OAUTH2_PROXY_COOKIE_SECRET
          valueFrom:
            secretKeyRef:
              name: oauth
              key: OAUTH2_PROXY_COOKIE_SECRET
The above loads the secret values into environment values in the oauth2_proxy Kubernetes pod.
To deploy oauth2_proxy:
kubectl create -f oauth2_proxy.yml
In a few moments, the oauth2_proxy Deployment will be running in Kubernetes. You can check the pods by running:
kubectl -n default get pods
oauth2_proxy use with the NGINX ingress controller to deploy the testoauth
Now to link it all together. In the Github repo there is an example deployment. This deployment takes advantage of all the components listed:
- The kube-cert-manager certificate (cert.yml).
This will a certificate resource, which the kube-cert-manager deployment will use to get certificate from LetsEncrypt for the site https://testoauth.littlefluffyclouds.io.
- The testoauth deployment (testoauth-deployment.yml).
Straightfoward, just an NGINX static page that has a little welcome message.
- The testoauth service (service.yml)
The tesoauth service, pretty simple.
- The NGINX ingress configuration (ingress.yml).
This is pretty unique. First, The NGINX ingress controller uses the following annotations for authentication requests:
    ingress.kubernetes.io/auth-signin: https://$host/oauth2/sign_in
    ingress.kubernetes.io/auth-url: https://$host/oauth2/auth
Second, there’s actually two ingress resources, one for the testoauth deployment and one for the oauth2_proxy. All traffic that goes to the path /oauth2 gets sent NOT to the testoauth deployment, but to the oauth2_proxy deployment, where oauth2_proxy goes through the authentication process:
apiVersion: extensions/v1beta1
kind: Ingress
metadata:
  name: oauth-testoauth
  namespace: default
spec:
  rules:
  - host: TESTOAUTH.EXAMPLE.ORG
    http:
      paths:
      - backend:
          serviceName: oauth
          servicePort: 4180
        path: /oauth2
  tls:
  - secretName: TESTOAUTH.EXAMPLE.ORG
    hosts:
      - TESTOAUTH.EXAMPLE.ORG
Note the path, /oauth2. All traffic going to https://littlefluffyclouds.io/oauth2, including sign_in and auth, will get directed to the oauth2_proxy service and NOT testoauth.
To deploy:
./deploy.sh
what it looks like
A working oauth2_proxy will look like the following:
A login page:
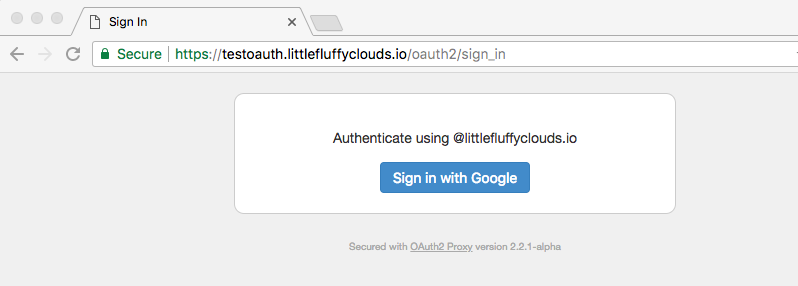
The Google authentication page:
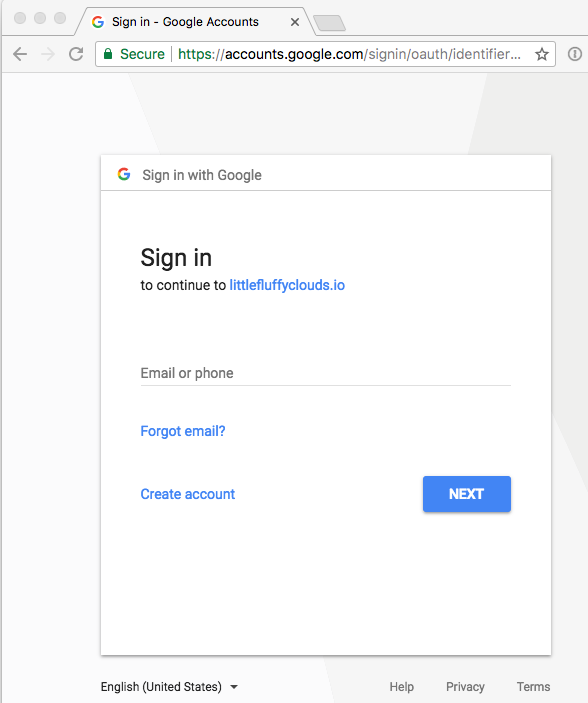
The web page after a successful login:
summary
What this allows us to do is provide authentication for any web service and use one of many providers for that oauth authentication. What’s great with this setup is that multiple pods/services can use this single oauth2_proxy deployment. It is incredibly handy and I like it a lot better than say using LDAP integration. It has limitations, such as the fact that it is reverse proxying traffic, and that may not always be optimal. But otherwise, it makes it very simple to slap authentication on any web service.
bugs, issues, and future improvements
- Need to exercise more oauth2_proxy options.
- Beware, with Google Cloud sharing outbound IP addresses, multiple people could be using the LetsEncrypt API and you could get rate limited (saw this happen).
links
- GKE oauth2_proxy deployment and examples - https://github.com/bonovoxly/gke-oauth2_proxy
- oauth2_proxy - https://github.com/bitly/oauth2_proxy
- NGINX Ingress Controller - https://github.com/bonovoxly/gke-nginx-ingress-controller
- Kubernetes Certificate Manager - https://github.com/bonovoxly/gke-kube-cert-manager
- PalmStoneGames kube-cert-manager - https://github.com/PalmStoneGames/kube-cert-manager
- Kubernetes NGINX Ingress Controller - https://github.com/kubernetes/ingress-nginx